These units, based on the research I have done, are pretty robust and are serving a good long time. That said, my 1981 240D with the bellows style VDO Tempomat actuator has been baking under the hood in the desert for many years and is finally not holding proper vacuum.
 |
| Mercedes W123 VDO Tempomat cruise |
NOTE: Before you get a new actuator, they are $640, make sure it is not the amplifier (the brains) under the driver side dash or a vacuum leak elsewhere. The amplifier is subject to intense heat and vibration and they do get fickle with age. Several symptoms of a amplifier going bad is being able to increase your speed using the cruise control lever but not being able to set that speed once you let go. Other scenarios include the cruise control cutting out while engaged.
I have already replaced my control unit with a remanufactured unit several months back as new units are not available from Mercedes.
Once the cruise control began working, I realized it had probably not been used in many years and the actuator began to malfunction after several trips on the highway. The symptoms: Once the speed was set, it would steadily lose it a few miles per hour every several seconds. Either the Tempomat was losing vacuum due to a dry rotting bellows or the internal vacuum/vent switch was not engaging properly. Either way, in my case, it was time for a new unit as I knew I did not have any vacuum leaks.
NOTE: It is also important to note that the cruise control actuator is to be hooked up to the 2/3 way yellow and gray vacuum check valve (some check valve used for the door locks) which draws vacuum from the vacuum reservoir tank located in the trunk above the gas tank. Make sure this is not leaking or it will cause problems with your cruise control among other problems.
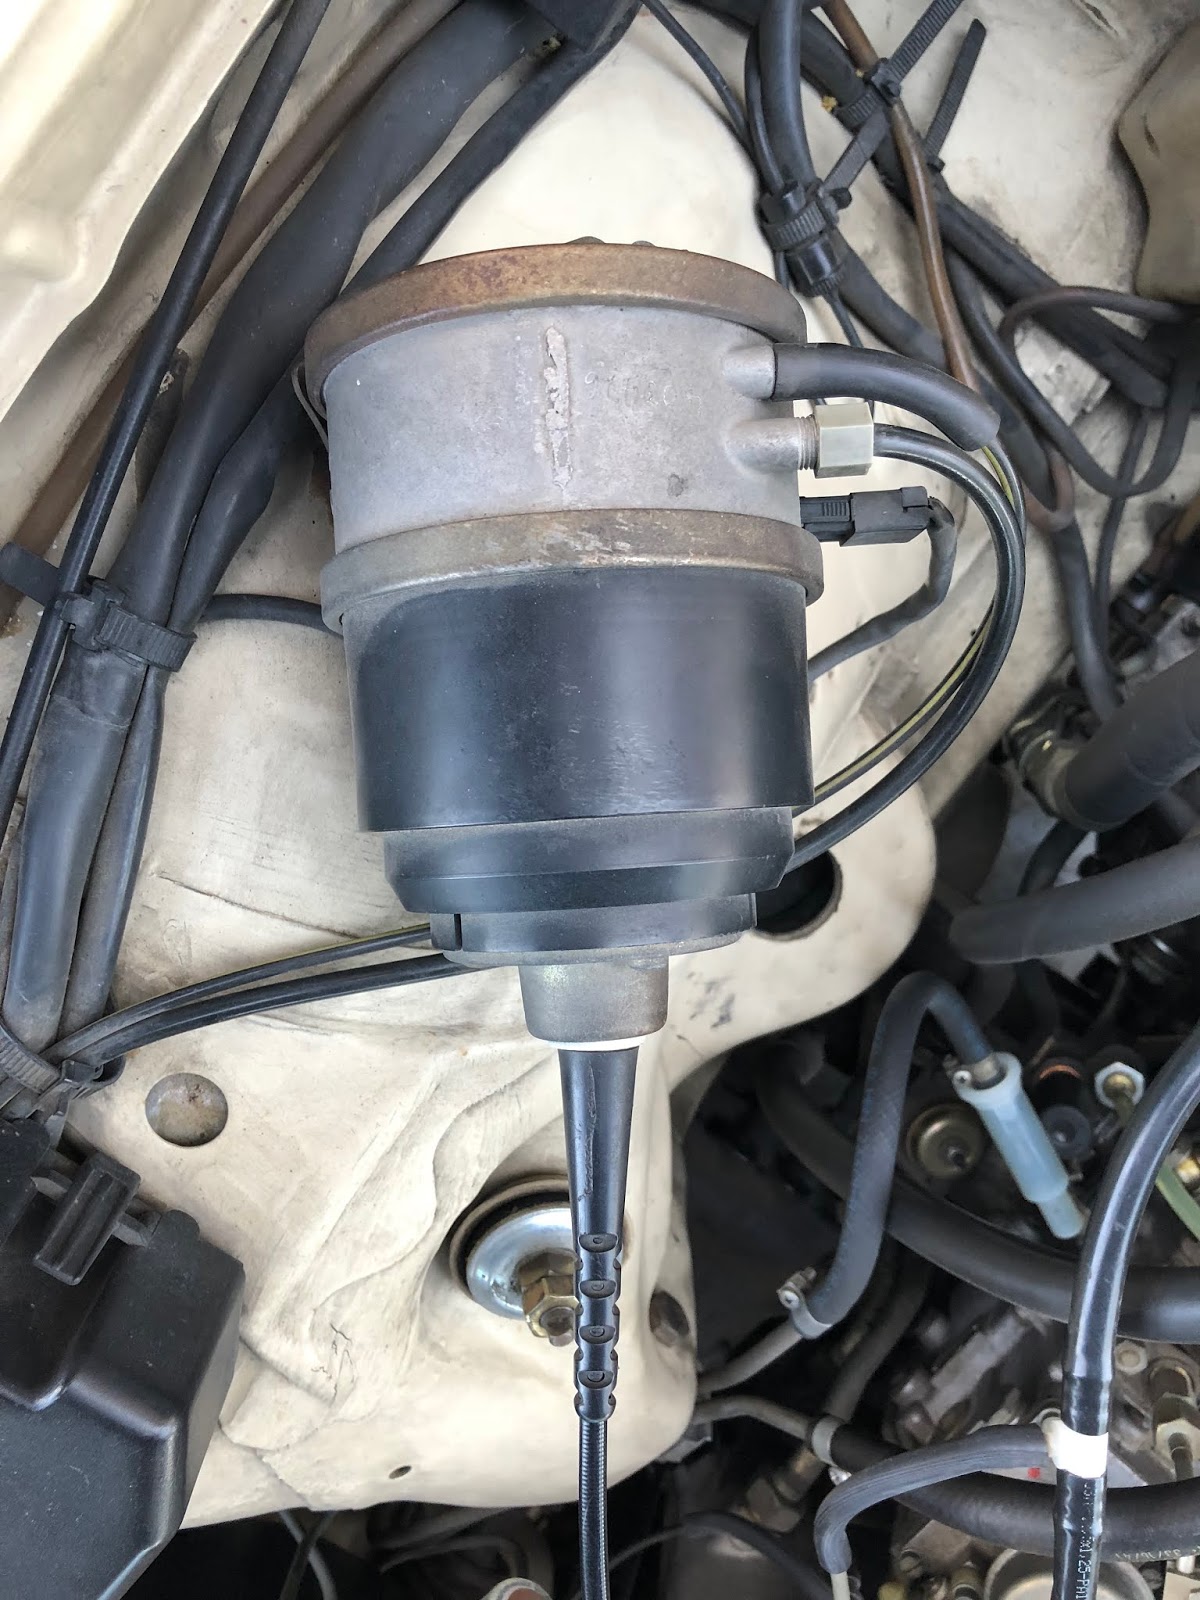
REPLACING THE VDO TEMPOMAT CRUISE CONTROL ACTUATOR
The replacement of the actuator is not complicated at all, but one that will require a great deal of finesse to remove the bowden cable, if you wish to save the cable. While there are a number of NOS actuators available from Mercedes, there are evidently only two bowden cables remaining in the global Mercedes stock.
While the cable is not fragile, all the plastic clips that are necessary to keep the cable in place are! If you break any of these clips the cable will not function.
STEP 1
Disconnect the vacuum, and vent lines along with the electrical plug. Now is the time to make sure no vacuum hoses or rubber connectors are failing.
 |
| Disconnect the three plugs show in the photo. The gray nut for the vent line is plastic! |
STEP 2
Remove the nut holding the actuator in the bracket.

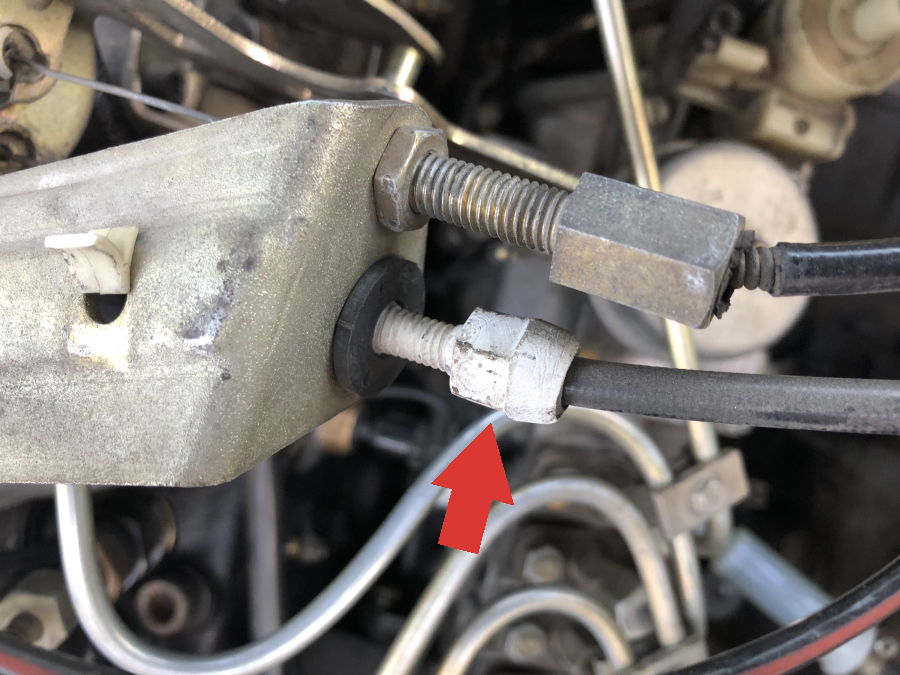
STEP 3
Carefully release the bowden cable from the throttle linkage (valve cover area). Remember, the plastic clips are very brittle and are ready to crumble. Gently using needle nose pliers will work well.
STEP 4
Unscrew the plastic threaded adjusting "nut" and once again using the needle nose pliers release the next section of the bowden cable.
STEP 5
Push the cable toward the actuator to give a bit of slack to remove the next clip. This clip is awkward to remove and is too ready to fall apart. Go slow and gentle.
STEP 6
Unscrew the three screws at the actuator retaining plate for the bowden cable. Give yourself enough slack for room to work.

STEP 7
Release bowden cable from cover

STEP 8
With the cable removed, the installation process is the reverse.
STEP 9
The following steps are for the W123 second generation diesel models only! To adjust earlier models, W115 and W123, please refer to the Mercedes Service Manual.
Adjust the cable. If the cable is not properly adjusted according to the Mercedes service manual the cruise control will not function properly. Make the following check and adjust cable length as necessary with the plastic threaded adjusting "nut": Press and hold the emergency stop lever (diesel) in the off position and check the slack of the cable.


