Monday, October 7, 2019

Mercedes Steering Coupler / Rag Joint Replacement

Excess play in the steering of your Mercedes-Benz might be an indication that the steering coupler or "rag joint" may need replacing. There are of course other factors that can cause loose or sloppy steering, but for the sake of this article we will only focus on the proper way to replace the steering coupler and do several other checks while doing the procedure.

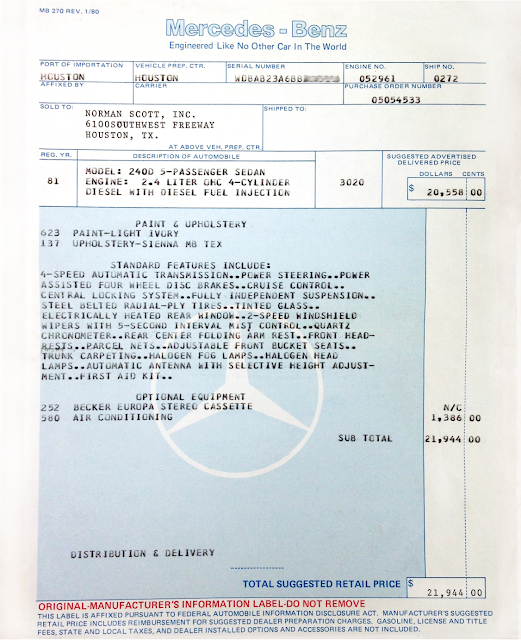
The work in this case is being performed on a 1981 Mercedes 240D - W123 (2nd generation steering column) and is also very similar in procedure as the early R107 and W123 series as well. Differences between Early R107 and W123 vs. later models is the set up of the steering column. Other models may be similar, but I advise you refer to the shop manual for the specific model for verification.

Again, there is much misguided information online for doing this job, however this is a very straightforward process that is listed in the Mercedes worship manual and does not require removing the steering box and also allows you to go through the and clean the steering shaft, bearings, etc. 

As you will see, this does not take incredible skill or time to perform. It should take no more than 1hr. to perform this service. I always recommend taking photos as you go!

Recommend parts for the job: Mercedes-Benz steering coupler MB Part: 1234600210, two coupler bolts MB Part: 2029902101. I do not recommend reusing the original bolts. Steering column boot (at firewall) MB Part: 1234621396

Optional Parts: steering column bearing MB part: 1269810025, directly behind steering wheel. My bearing had been making noise and discovered it was full of dirt. This may be more of an issue due to the car having spent its entire existence in the desert. There is also another identical bearing at the opposite end of the steering column tube, but mind was not acting suspicious and so I just sprayed lube into the bearing area.Regardless, it may be a good time to re-lubricate it. I use Würth greases for hinges and fittings such as this along with the throttle linkage which should be lubricated yearly.

STEP 1
Disconnect Battery

STEP 2
Remove driver side under dash covering. 

STEP 3
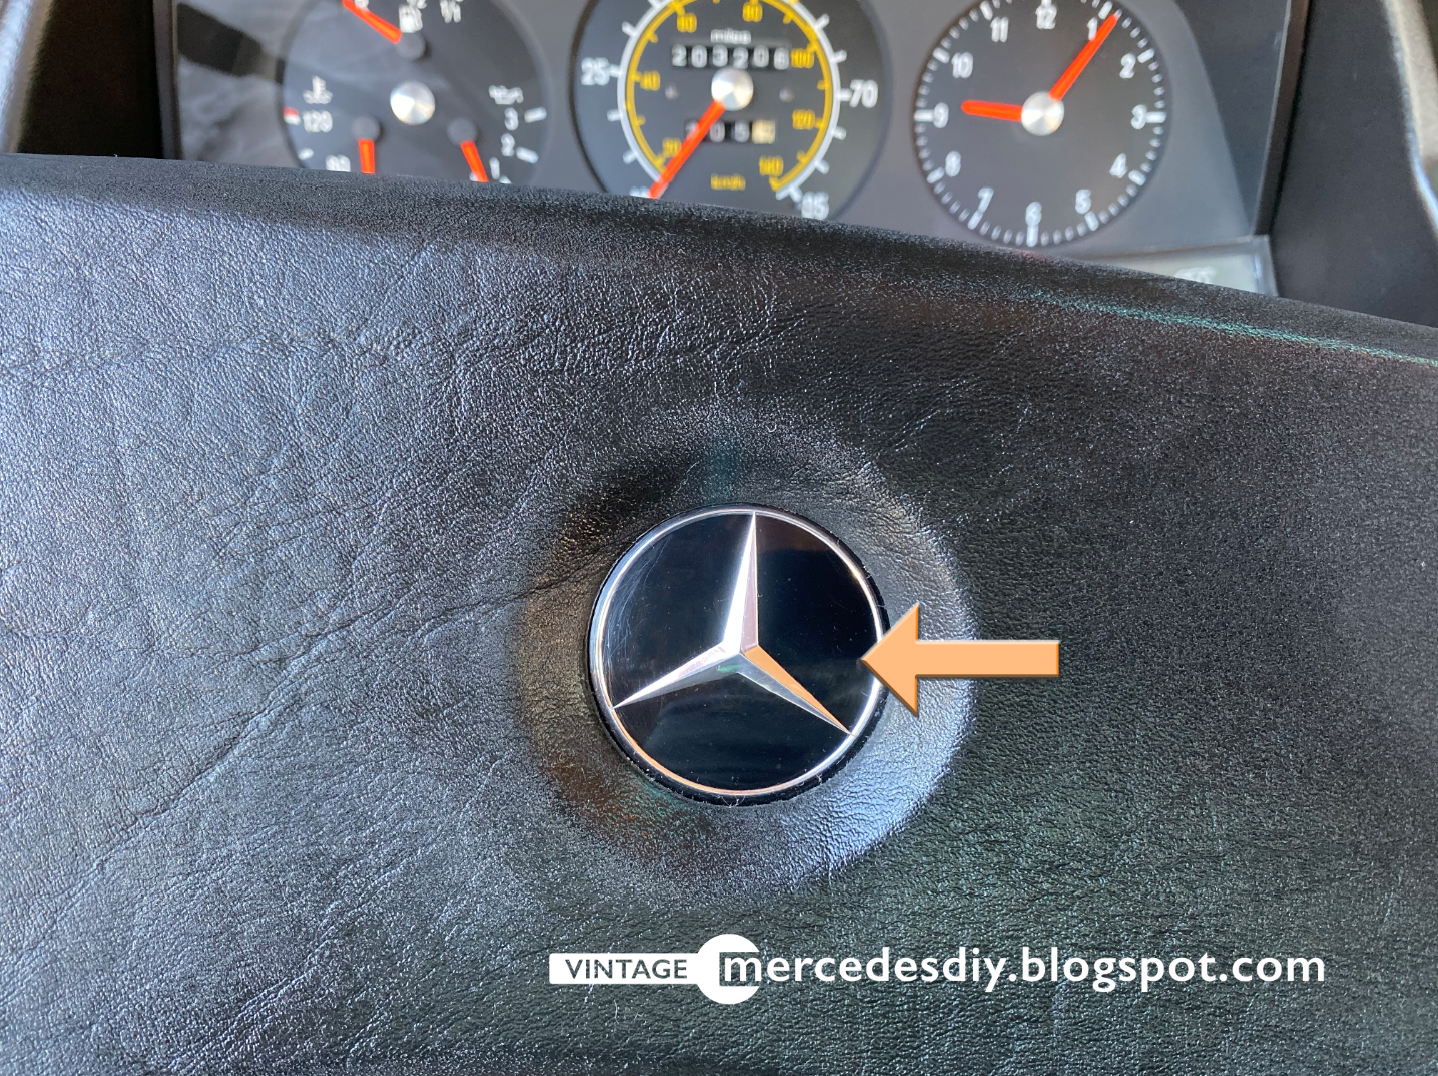
Center wheels, this is not critical on removal but will have to be done on reassembly. Remove steering wheel emblem or horn pad, which ever is less destructive to the old materials. Always go gently and do not use a screwdriver. Only use plastic trim removal tools. 


STEP 4
Remove steering wheel hex cap screw or nut and remove steering wheel. The hex bit socket should be 10mm. Always make sure the socket for either the nut or the screw the perfect fit and is fully stetted. IMPORTANT: Do Not use the steering wheel lock for the resistance needed to remove the steering wheel hex socket screw, or nut. Unlock the steering column by means of your key and be sure it is fully unlocked before proceeding. 


Shown on W123 late model


STEP 5
Remove rubber multi-stalk control boot at column. Gently pry off with plastic trim removal tool.


STEP 6
Unscrew multi-stalk controls from column in addition to the horn contacts (1 brown, 1 black wire)


STEP 7
Unplug turn signal stalk and cruise control (if equipped) from underside of dash to left of steering column.


STEP 8
Gently work wires and plugs through steering column. While it all looks like too much to come through, it will, but it's a snug fit. Don't yank as you can break solder connections in plug. Once the unit has been removed from the steering column notice the exact position of the steering shaft. The steering shaft is in the correct position when the shaft locks into position with the key out of the ignition. THIS STEP IS IMPORTANT for reassembly to ensure the steering wheel locks when car is parked and to ensure turn signal will cancel and remain on at the proper times. 


STEP 9
Remove decretive column cover. This step is not necessary, but since I was in it this far I decided to remove two screws and detach the short plastic column cover for cleaning. You will however need to remove snap ring around steering shaft. 


STEP 10
Put steering wheel back on shaft, but do not bolt on. Open the hood to access the steering coupler (rag joint).

STEP 11
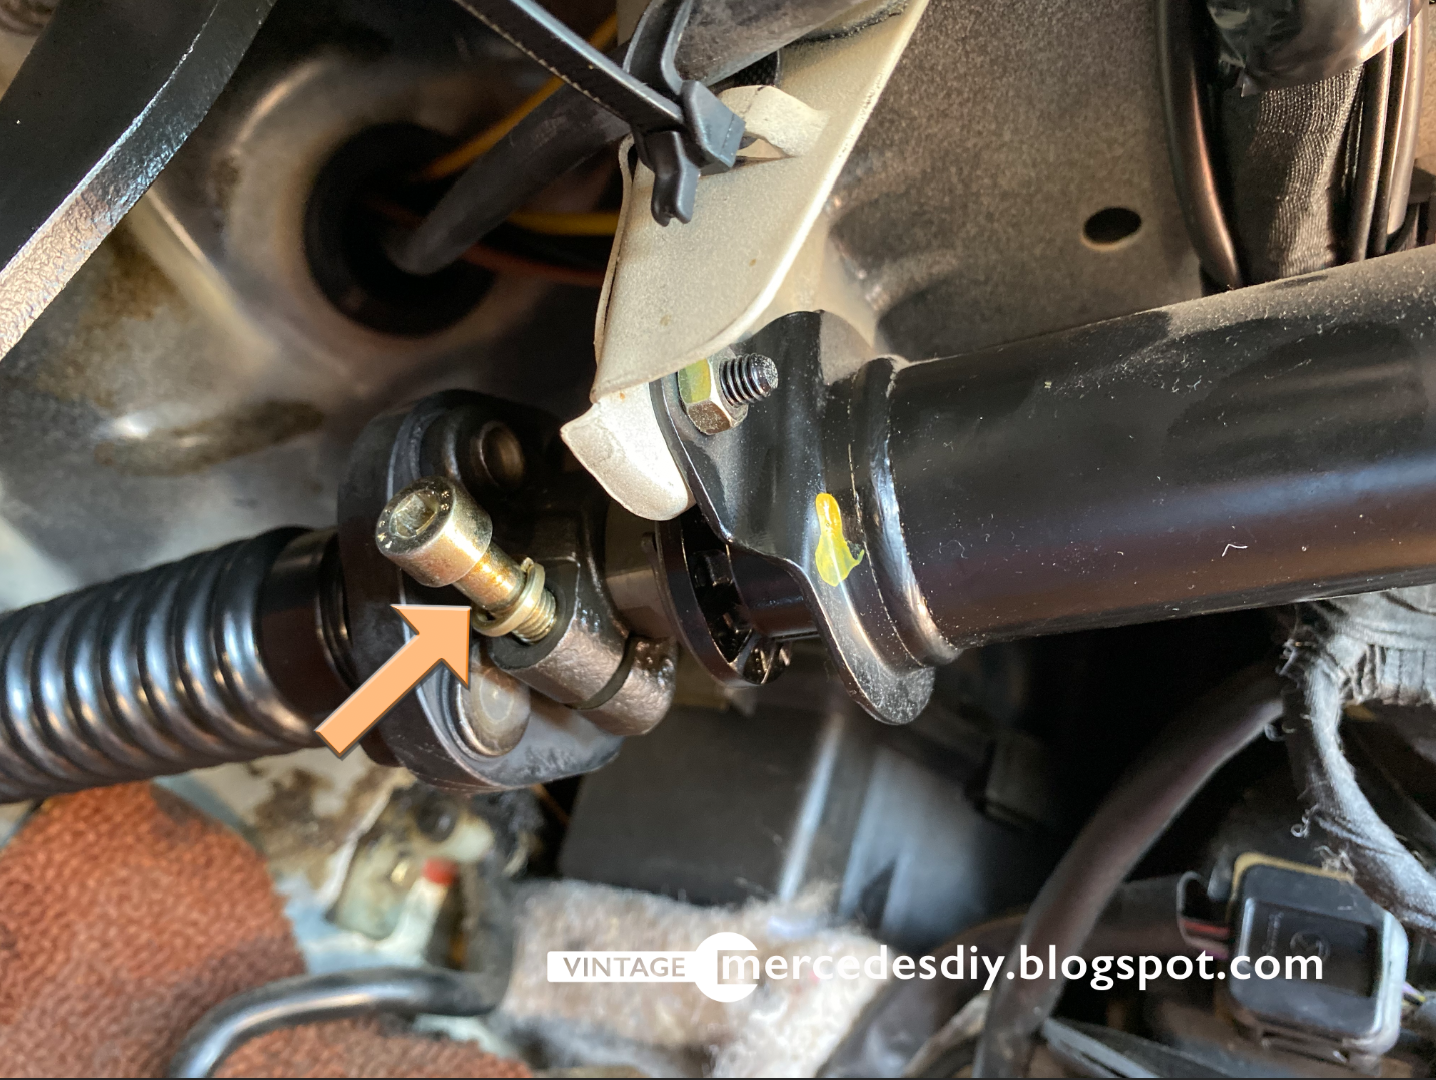
The two hex cap screws are located adjacent to each other with the two screws facing opposite directions. This will require the steering wheel to be turned slightly to access both screws. Again, DO NOT strip these hex socket screws. If the car has lived in a humid/winter environment soak liberally with PB blaster or similar 3-4 hours prior to removing. It is strongly advised to use air impact tools for removal to reduce the chance of stripping the head.


STEP 12
Return to inside of car and undo hex socket screw from the second coupler under the dash. The steering wheel may need to be rotated a bit to access the screw. Once the screw is accessible, remove using a socket wrench. This one is not going to be seized unless it has gotten wet. Once removed, turn the steering wheel a few inches left and right to loosen the interior coupling. 


STEP 13
Remove steering wheel.

STEP 14
From inside of car, remove steering column boot and press toward the engine bay. More than likely this boot will be very dry rotted and will need replacing. The part is available from Mercedes-Benz. 

STEP 15
At this time you will also jack up the front of the car and place jack stands at the proper jack points. Remove driver side wheel and remove the three bolts holding the steering box to the fender. NOTE: I found this to work best with two people to make sure the steering box did not shift to suddenly. The steering box will sit in place once released. To make room to easily remove the steering coupler, simply move the steering box toward the front fo the car about 1-2 in. or 2.54 - 5.08cm. You will need someone to also help you bolt the steering box back into position once the new coupler has been installed.

STEP 16
With a suitable long handled flat end pry bar, loosen steering coupling by gently pressing toward firewall. Once the coupler is mostly released from the splined steering box shaft, you may need to return to the side of the car to gently wiggle the crush tube portion of the steering column away from the main steering shaft. I discovered a few back and forth trips, between wiggling the coupler and the crush tube loosened it up and the coupler and the crush tube easily separated. 


STEP 
At this point you are ready to install your new coupler, boot, and screws. IMPORTANT: When fitting the new coupler, it is critical that the steering shaft be properly aligned as described in STEP 8. In addition, the wheels need to be manually adjusted to straight ahead, or your steering will be off center. DO NOT, compensate adjusting your steering wheel installation for not having your wheels in the proper position. Steering coupler screws should be torqued to 25Nm. 

Don't forget to put your new boot on before you affix the coupler.

STEP 18
MAKE SURE EVERY NUT, BOLT, SCREW AND SNAP RING IS PROPERLY FITTED! Take a test drive on side streets making plenty of turns etc. before going out on the highway. Check and recheck your work. 

Optional Bearing Change

If you wish to change out the nearside steering shaft bearing it is indicated in the photo below.


Gently tap bearing out evenly all the way around. It will require separating the bearing from the housing with a fine screw driver you are willing too dull. It will take a minute or two of some determined tapping, not beating. When the bearing has been removed install new bearing with even taps around entire circumference as to not insert at any angle. 


Thursday, September 12, 2019

W123 Mercedes CV Boots and Axles

Cracked CV boots are nothing new, but replacing them can be costly, and the axles might not warrant the time or money if the milage is high enough or the boots have cracked. Reconditioning an axle in uncertain condition will likely not serve you well in the long run and could easily lead you to spend even more money having to install new axles in the end. Instead, consider replacing the axles. Wait! It's not as hard as it sounds!

Mercedes-Benz used two types of axles, homokinetic and annular. According to Mercedes, the W123 could have either axle depending on the year it was built so make sure you check your vin and the axle itself before you make a purchase. Regardless, if you are in need of new CV boots with original high milage axles, this would be the time to move ahead with replacing the entire unit.  If your chassis is already fitted with annular, the job will be that much simpler. 

So what's the difference? What's better? Why convert? Who cares?

The difference between homokinetic and annular is how it functions, and that is a subject we will not cover here, but we will cover how they differ with regard to installation.

The following image shows the Mercedes-Benz OE annular axle along side the aftermarket axle that is a cross between an annular and a homokinetic based on the one piece design. The Mercedes axle as you can see requires a "flange" sitting separate from the axle which will be permanently installed in the differential making for a much simpler repair or replacement in the future.


At this point you have several options for this job. First, you can purchase a rear axle flange (needed for conversion from homokinetic to annular) and annular axle from Mercedes. Second option, purchase an aftermarket or refurbished homokinetic unit. Third option, install an aftermarket unit.

Is one better than another? If you are purchasing MB annular axles (homokinetic is no longer made by Mercedes), you are getting an excellent product, the same quality that has probably lasted 40 plus years. Should you go the direction of aftermarket or rebuilt, you run a good risk of noise, vibration and a much shorter life span.

After much research, I purchased what I believed to be the best aftermarket axle on the market, and unfortunately had my slight bubble of hope burst by what I saw, felt and heard. In fairness, it didn't appear all bad, but nothing I would want on my car. Ultimately I wanted to see if a $160 aftermarket axle could by chance prove good enough, and sadly it did not. Most often the old adage holds true, "you get what you pay for".

In brief, the new aftermarket axle right out of the box had a tremendous amount of play in each joint, along with internal components that already clicked and clacked against each other while being pivoted by hand. The original Mercedes axle however, was nearly impossible to move by hand, and no internals could be heard contacting each other what so ever. Several other observations with the aftermarket: the boots were manufactured of substantially thinner rubber, and one of the boots was not installed neatly. In addition the shaft was substantially thicker than the MB unit leading me to believe they have used an inferior steel and need the extra diameter for structural integrity. There were also numerous other areas that lacked the detailing where seals were to seat etc. 

These multiple deficiencies did not build my confidence in the product as a whole and further more I did not want to risk introducing a potentially inferior component into a differential that I know is in immaculate condition. 

On the flip side, no matter which direction you decide to go, installing either axle style is not difficult, but requires more work to change out the homokinetic / aftermarket style should the time come again. As stated previously, the annular is very straight forward after the MB flange is fitted.

Coming Up:  Step-by-Step removal and installation of the rear axles.

Sunday, September 8, 2019

Retro W123 Mercedes Factory Window Sticker, Booklets


It's not often that one gets to purchase a car with most all of the original paper work, manuals, etc. I was grateful to have had the opportunity to acquire my 1981 Mercedes 240D from the original owners of 34 years who not only kept the car in near perfect condition, but included most all the original near perfect documentation from the factory.

Liking automotive history and the stories that go along with cars got me thinking that as younger generations begin to collect cars, many might not have access to some of the original factory pieces. In as much, many old enough to have known these cars from the beginning may have all but forgotten just how it was.

The following I compiled as both a historical perspective, and for some a journey down memory lane. You will see the original books (and page examples in the books) manuals,  inserts and factory invoice (window sticker), and the touch-up paint that came with my 1981 240D. From what I have been told, the only piece that is missing is the service log booklet.


Manufacturer invoice "window sticker"


This would also have been on the window adjacent to the above window sticker


Original envelope mailed June 16, 1981 to owners after purchase from Mercedes-Benz U.S.A. in New Jersey. The following 8 documents were in this envelope.  


Document 1 from envelope

Document 1 example of inside pages

Document 2 from envelope


Document 2 example of inside pages


Document 3 from envelope


Document 4 from envelope


Backside of document 4 above

Document 5 from envelope

Document 5 example of inside pages


Document 6 from envelope

Document 7 from envelope
Document 8 from envelope
Owner's Manual and other glovebox documents that came with car at time of purchase
1981 240D, 300D, 300CD Mercedes-Benz owner's manual

1981 240D, 300D, 300CD Mercedes-Benz owner's manual inside pages
1981 Mercedes U.S.A. diesel fuel guide dealer location booklet
1981 Mercedes U.S.A. diesel fuel guide booklet inside pages

1981 Mercedes North America FM Stereo Radio usage booklet
1981 Mercedes North America FM Stereo Radio usage booklet inside pages
This 1981 Mercedes Consumer Information booklet is applicable to the 240D as well and was required by U.S.A. Federal law on stopping abilities etc. It appears Mercedes was able to use this with all W123 models as the information was applicable throughout the model range
This 1981 Mercedes Consumer Information booklet inside pages
Hang tag on cruise control stalk still complete with original string


Tire information card. This was found under the original spare tire from 1981


This sticker is located on the inside of trunk lid


Touch-up paint


This is a photo of the Norman Scott, Inc. Houston, TX dealership where my W123 was purchased. Image appears to be from the 70's. From this photo the dealer did not sell Mercedes-Benz at the time, and evidently did not sell Mercedes for very long. Research shows that Norman Scott, Inc. primarily sold Porsche and Audi for most of its existence along with several other dealerships that sold other marques.