|
| Mercedes-Benz 1975 450SL Heater Box with ducting attached (pre auto climate control) |
I would suggest it is not very hard, but it is very time consuming and requires plenty of patience and detail oriented work. If you are going to tackle this project, a considerable amount of the cabin needs to be removed and that is not necessarily fun. That said, it will save you a great deal of money to do it yourself. I will say, whatever someone charges for this job, deserves every penny. I inquired with Mercedes and was told it would be about $3,900 to remove and reinstall the box. The price would go up even more if parts were needed.
So, if you don't have heat, or leaking / dirty evaporator that's not cooling properly, and you desperately search the online forums for how to reroute hoses to bypass the leaking heater core, consider doing the job right. There is no reason to own one of these great classics without the creature comforts. Moreover, the relatively short time it takes to do this job will give you many years of enjoyment.
Some things to know upfront however, before you get started. This blog will not go into detail on the project but give an overview of the process. Should anyone wish for more detail you may respond to this post and I will consider a more step-by-step write-up.
If you own a 1973-76 SL/SLC, the following will or may need to be removed, depending on the model year.
I am going to cover the heater box removal specific to a 1975 450SL. Remember, Mercedes relocated a few components here and there over the production life.
Not necessary to remove, but very helpful:
• Both seats.
Necessary to remove:
1. Steering wheel
2. Center console
3. Dashboard (A pillar trim must also be removed at this point)
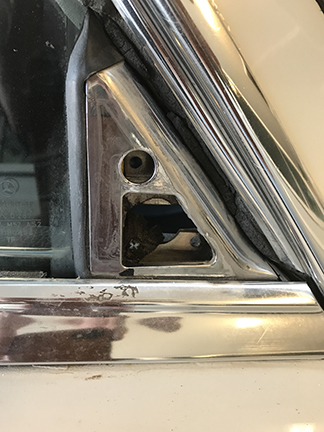
4. Exterior air intake grills at cowl (remove No. 5 first to see if you can access the hose clamps from there. If not, proceed back to this step)
5. Heat/A/C blower unit
6. Front floor mats
7. If the car is equipped with refrigeration, that system will need to be vacuumed down.
8. Three quarts of coolant will also need to be drained from the radiator, not the overflow tank to prevent even more coolant from flowing into the car.
9. Cruise control unit
10. ECU
11. A/C drain hoses (each side of heater box)
12. Center dashboard / console brace
13. Front heater box brace
14. Upper heater box mounting bolts
15. Main ducting from heater box to side and floor vents
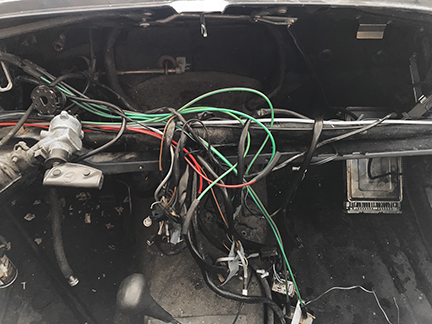
16. Zip ties retaining main wire harness and vacuum lines along support brace
NOTE: Cover all remaining flooring with plastic and towels as a quart or more of coolant will drain from the heater core when it is being removed.
Once the previous items have been removed, it is now time to remove the heater box. Again this is a brief overview of the process.
1. If equipped, disconnect the two A/C lines to the evaporator.
2. Disconnect the two heater hoses from under the cowl area. You may have to access the hose clamp screw by depressing the fresh-air inlet flap from the outside.
NOTE: I used half-sized, labeled Ziplock bags for each nut and bolt I removed for easy re-assembly.
Once the above items have been removed, the heater box can be removed from the passenger side of either a LHD or RHD respectively. I found bringing the wire harness up and over the top of the support brace worked easier than dropping it below to gain the necessary room to pull the heater box forward enough to free the heater matrix (core) pipes from the firewall. Once the pipe ends have entered the cabin, gently bend the pipes downward on each side to allow the heater box an easier journey to the footwell of the passenger side floor. It will take some wiggling and gentle rocking and twisting to free it from the transmission tunnel.
When the box is removed, be sure to check for rust from above and below! Now is the best time to deal with that.
Parts to renew while you are this far into the system:
1. Heater hoses
2. A/C hoses
3. Plastic rivets for air-inlet grills
4. Expansion Valve
5. Vacuum actuators (fresh-air inlet flaps)
6. Heater box drain hoses (if equipped with A/C)
7. Drain hose grommets through transmission tunnel
8. Clips (if any were lost or damaged in the process of removal)
9. Heater box / blower motor gasket (can only be replaced with heater box out of car)
10. Heater matrix (core) firewall grommets
11. Check red throttle linkage grommet if worn or brittle. Now is the time to change that.
12. Vacuum switches (X2) at rear of flap levers (if not functioning)
13. All rubber vacuum hose connections.
All parts listed above are still available through Mercedes-Benz.
Again, if there is an interest in a more detailed breakdown of the process, I will consider doing another blog with additional photos.
The next step is giving the heater box a good overhaul and testing all the systems. My heater box was full of dirt and some stuff I was not expecting to find.
IMPORTANT NOTE: If you own a 1973-1976 SL/ SLC, the A/C evaporator is factory sealed into the case. According to the Mercedes-Benz workshop manual for the heating and cooling system, the case "can not be separated without damaging the heater box." With much study of the system, I was able to cleanly and easily remove the "factory seal" and restore the unite as original. This step is very worth the time, effort and money (if you can't do this step yourself) if the box is already out.
I contacted many shops around the world to see if a new unsealed heater box could be obtained and they are simply no longer manufactured. Later boxes will not work as the system was changed to an automatic climate control system from Chrysler Motor Corp. and one you don't want to retrofit. The manual system is far superior.
• Heater box overhaul
• Dashboard refurbishing
• Weather seal installation
So, if you don't have heat, or leaking / dirty evaporator that's not cooling properly, and you desperately search the online forums for how to reroute hoses to bypass the leaking heater core, consider doing the job right. There is no reason to own one of these great classics without the creature comforts. Moreover, the relatively short time it takes to do this job will give you many years of enjoyment.
Some things to know upfront however, before you get started. This blog will not go into detail on the project but give an overview of the process. Should anyone wish for more detail you may respond to this post and I will consider a more step-by-step write-up.
If you own a 1973-76 SL/SLC, the following will or may need to be removed, depending on the model year.
I am going to cover the heater box removal specific to a 1975 450SL. Remember, Mercedes relocated a few components here and there over the production life.
Not necessary to remove, but very helpful:
• Both seats.
Necessary to remove:
1. Steering wheel
2. Center console
3. Dashboard (A pillar trim must also be removed at this point)
4. Exterior air intake grills at cowl (remove No. 5 first to see if you can access the hose clamps from there. If not, proceed back to this step)
5. Heat/A/C blower unit
6. Front floor mats
7. If the car is equipped with refrigeration, that system will need to be vacuumed down.
8. Three quarts of coolant will also need to be drained from the radiator, not the overflow tank to prevent even more coolant from flowing into the car.
9. Cruise control unit
10. ECU
11. A/C drain hoses (each side of heater box)
12. Center dashboard / console brace
13. Front heater box brace
14. Upper heater box mounting bolts
15. Main ducting from heater box to side and floor vents
16. Zip ties retaining main wire harness and vacuum lines along support brace
NOTE: Cover all remaining flooring with plastic and towels as a quart or more of coolant will drain from the heater core when it is being removed.
Once the previous items have been removed, it is now time to remove the heater box. Again this is a brief overview of the process.
1. If equipped, disconnect the two A/C lines to the evaporator.
2. Disconnect the two heater hoses from under the cowl area. You may have to access the hose clamp screw by depressing the fresh-air inlet flap from the outside.
NOTE: I used half-sized, labeled Ziplock bags for each nut and bolt I removed for easy re-assembly.
Once the above items have been removed, the heater box can be removed from the passenger side of either a LHD or RHD respectively. I found bringing the wire harness up and over the top of the support brace worked easier than dropping it below to gain the necessary room to pull the heater box forward enough to free the heater matrix (core) pipes from the firewall. Once the pipe ends have entered the cabin, gently bend the pipes downward on each side to allow the heater box an easier journey to the footwell of the passenger side floor. It will take some wiggling and gentle rocking and twisting to free it from the transmission tunnel.
When the box is removed, be sure to check for rust from above and below! Now is the best time to deal with that.
 |
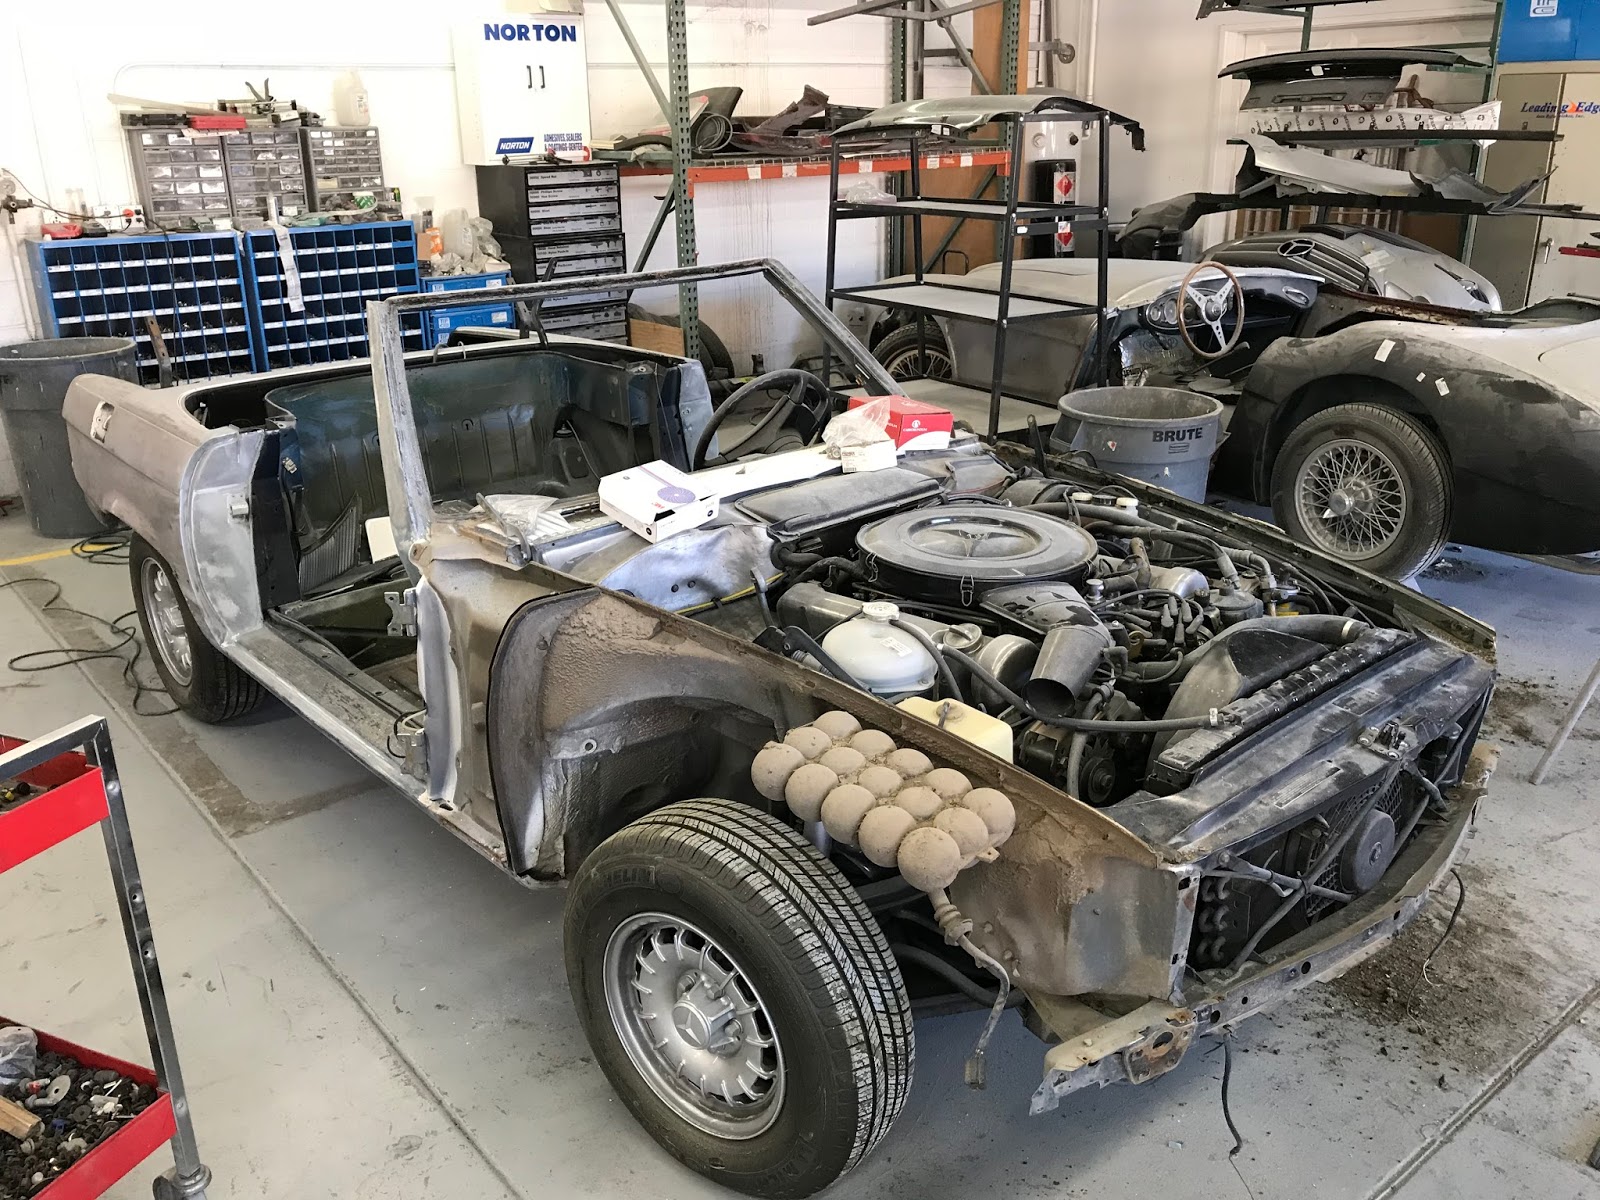
| View of dash area once heater box has been removed. It looks worse than it really is. |
 |
| Heater box right after removal |
Parts to renew while you are this far into the system:
1. Heater hoses
2. A/C hoses
3. Plastic rivets for air-inlet grills
4. Expansion Valve
5. Vacuum actuators (fresh-air inlet flaps)
6. Heater box drain hoses (if equipped with A/C)
7. Drain hose grommets through transmission tunnel
8. Clips (if any were lost or damaged in the process of removal)
9. Heater box / blower motor gasket (can only be replaced with heater box out of car)
10. Heater matrix (core) firewall grommets
11. Check red throttle linkage grommet if worn or brittle. Now is the time to change that.
12. Vacuum switches (X2) at rear of flap levers (if not functioning)
13. All rubber vacuum hose connections.
All parts listed above are still available through Mercedes-Benz.
Again, if there is an interest in a more detailed breakdown of the process, I will consider doing another blog with additional photos.
The next step is giving the heater box a good overhaul and testing all the systems. My heater box was full of dirt and some stuff I was not expecting to find.
IMPORTANT NOTE: If you own a 1973-1976 SL/ SLC, the A/C evaporator is factory sealed into the case. According to the Mercedes-Benz workshop manual for the heating and cooling system, the case "can not be separated without damaging the heater box." With much study of the system, I was able to cleanly and easily remove the "factory seal" and restore the unite as original. This step is very worth the time, effort and money (if you can't do this step yourself) if the box is already out.
I contacted many shops around the world to see if a new unsealed heater box could be obtained and they are simply no longer manufactured. Later boxes will not work as the system was changed to an automatic climate control system from Chrysler Motor Corp. and one you don't want to retrofit. The manual system is far superior.
UP COMING BLOGS
• Heater box overhaul
• Dashboard refurbishing
• Weather seal installation