Thursday, January 28, 2021

Mercede-Benz Museum Virtual Tour

 A COVID SAFE TOUR OF THE MERCEDES-BENZ MUSEUM


Perhaps a virtual COVID free trip to Stuttgart, Germany will do some of us car enthusiasts good while we are bound to our homes. 

This brief photographic tour of the Mercedes-Benz museum and headquarters located in Stuttgart, Germany is for any Mercedes enthusiast who has not had the opportunity to visit. 

After many trips to Germany I finally visited the museum in 2019. I hope you enjoy your visit.


Mercedes Benz Experimental Safety Vehicle


Monday, January 25, 2021

W123 Diesel Buyers Guide | 240D | 300D | 300CD

Find the Best Mercedes Diesel W123

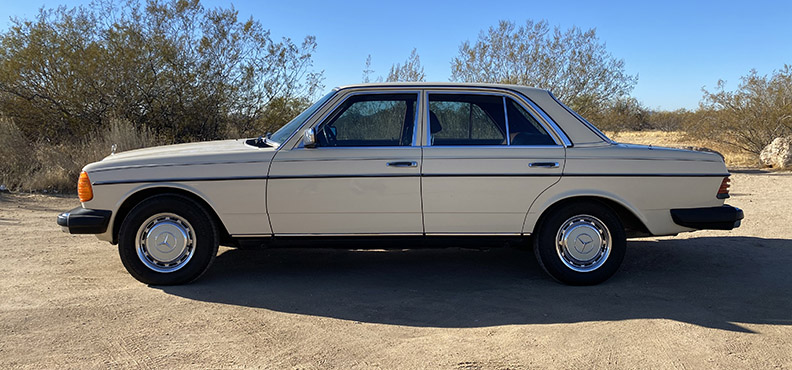
A very pampered all original 1981 Mercedes Benz 240D with 207,000 miles


One of my readers asked what to look for when purchasing a higher mileage 240D. In this instance the car he was looking at had logged 200,000 miles. Is this still a good purchase? Let's dig and and find out.

If you are in the market for a W123 Diesel there are several things you should know before you take the plunge. This article will focus strictly on sedans and coupé models of 4 and 5 cylinder models with and without turbo. The TD model will not be discussed here as they have their own unique issues that I am personally not familiar enough with to discuss.

So just how do you find a worthy diesel W123? 


LET'S DISCUSS RUST

1. Depending on where the car has lived, I wouldn't even drive it or care to know if it even runs with out first thoroughly checking for rust. Just because it is a Mercedes doesn't mean it can't suffer from sever corrosion issues.

• If at all possible get it up on a lift and check all of the sills and wheel arches carefully. If it looks too new or clean I would do a lot more digging to find out if it was repaired or if damage was covered over. If you can't get it up on a lift, make sure you get on the ground and get the best view you can with a bright flashlight. Be sure to knock on the metal, poke, squeeze etc. all around. 

• Inspect the trunk. Ask to have the side plastic liners, and spare tires removed for your inspection. If the back window or trunk gasket has or is currently leaking you could have a disaster of rust on your hands to contend with. In addition check the gasket and the areas between the gasket and the fender and rear window. Gently tug on the gasket in numerous areas to make sure it still has a good seal. 

• Open the hood and check the hinge areas to make sure they are free of rust and that the drain holes are free from debris. If these areas get filled with debris, the water will not drain and cause considerable rust issues. 

• Should the car be equipped with a sunroof, make sure it functions well. Open it and inspect the gasket and for any rust around the perimeter of the seal and the roof portion itself. These sunroofs are prone to leak and rust. Check also the headliner for any potential water damage. 

• Check the lower corners of the rear window for rust

• Lift the floor mats front and back and check for any rust from water accumulation. This can be caused by a car sitting outside with the windows left open or from windshield gasket damage or as simple as the car having been in a flood.

1981 Mercedes Benz 240D Engine Bay


THE MECHANICS

Mercedes built, in my opinion, the best 4 and 5 cyl. Diesel engines in existence today. Along with a stout, safe and beautiful body design, it is no doubt an icon of automotive history.

As the owner of a 1981 240D with 207,000 miles, I would not think twice about hopping in my car for a trip across the U.S. I do however know this car very well, and have become intimately involved with the car and know exactly what has been done from front to back. With that, owning a W123 is great fun, but is most enjoyed when you can drive it like any other late model car in your garage. 

So, what to know, feel and listen for:

STARTING

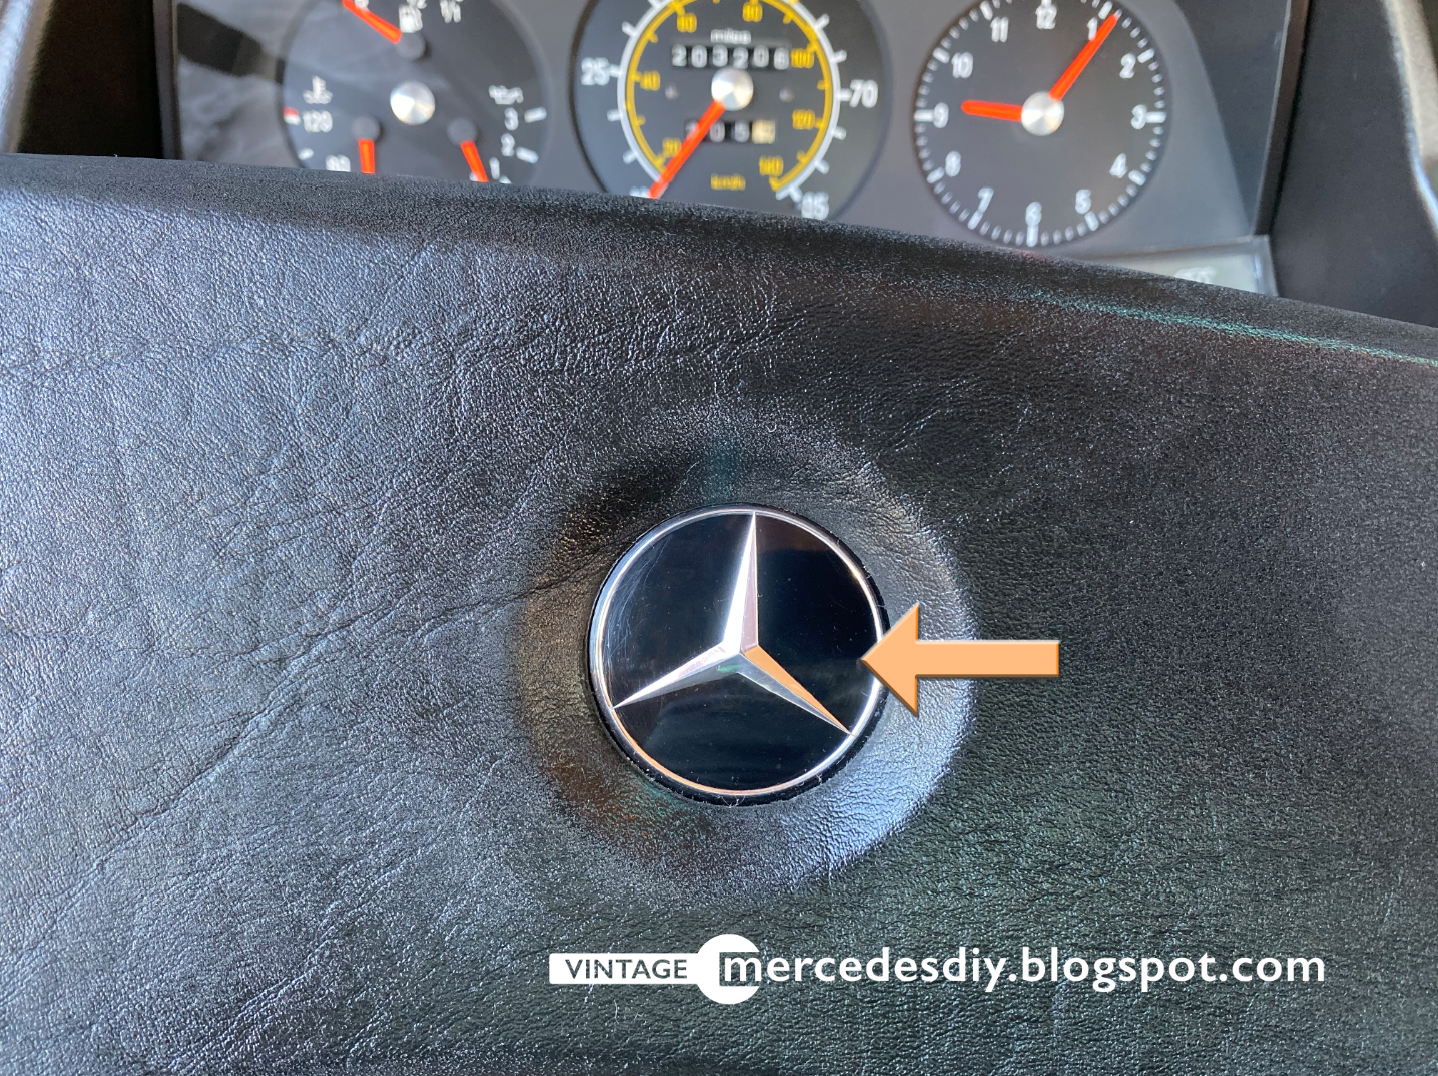
• When you visit the car for a test drive, request the car not be run for at least 24 hours before your arrival. While you may not fully know if this happened, make sure when you turn the key to heat the glow plugs, the temp gauge reads fully cold.

Starting from fully cold will indicate several things. For one, it will give you a good idea on compression and two it will tell you if the preheat system is in good working order. Should the temps be in the 70ºF plus degree range when starting the car from cold, the amber glow plug light on the dash should remain light for approximately 4-5 seconds. In the 40ºF - 50ºF range it should take approximately 6-8 seconds and at 32ºF about 9-12 seconds. 

Under the conditions mentioned above, the car should start in the first 2-3 seconds max. It may be a few seconds longer at freezing and below. If you are testing a car in freezing and below, inquire if the car has had anti-gel mixed with the diesel in order for it to flow properly. If the anti-gel has not been added the diesel will be too thick to flow. 

If the system is in need of new glow plugs, other pre-heat components or has bad compression the car will likely crank for longer than normal. If the car cranks for longer than 3-5 seconds, turn the key back to the off "0" position and restart the pre-heat process again. Should the car start immediately after a second heating cycle, it will most likely indicate that the glow plugs are fowled from carbon or in need of replacement.

Should the car remain difficult to start, sputter etc., it could indicate the following: Clogged fuel tank filter, clogged primary and secondary fuel filter, injection pump timing, poor compression. 

• With a fully warm excellent condition engine, the car should start almost faster than you can let go of the key. Remember a fully warm Mercedes diesel, means it was not running for the past 15 or so minutes. These engines cool down rapidly and will require a pre-heat for maximum starting efficiency.

• As soon as the engine starts, the oil pressure should indicate 3 bar within 3-4 seconds. Just as soon as you make sure that checks out, quickly get out and take a look at the color and amount of exhaust. Believe it or not, a well maintained engine should emit very little smoke which should be brownish black in color. Any blue or white should indicate more extensive engine testing be performed such as compression. 

When the engine is fully warm only a very little brownish black smoke should be seen when taking off from a stop and not be visible at all from the rearview mirror once up to speed. I would personally have someone follow me and give an account for how much smoke and color when the car is under load. Many mechanics will say "all these cars smoke a lot and always have" which is not quit true. They do smoke more than a gasoline engine but should not emit a black contrail in the wake of your departure.

NOTE: If you have a 300D or 300CD turbo models, I would have that check out by a reputable mechanic who knows old Mercedes.

The following videos show start up from cold (dashboard view), start up from warm (engine view), tail pipe emissions under load, 


TURNING THE ENGINE OFF

After starting the engine turn it off after about 2 minute. The engine should stop immediately while giving the car a good shake. If the engine should hesitate to stop immediately there is most likely a vacuum leak somewhere in the system or the vacuum pump is not functioning properly. If the engine does not turn off with one solid shake, there is likely a compression issue. You should definitely feel the car jolt when the key is turned off. Should the engine not turn off at all once the ignition has been turned to the off position there is most likely a bad vacuum leak due to cracked hosing. Should this happen the engine can be stopped manually by way of a lever mounted at the backside of the valve cover. Yes, Mercedes built this feature in to the system for this very reason.


CHECKING FLUIDS

As with any car, check that the crank case has the proper amount of oil. Proper for these cars are mid-way between the low and full mark. Looking at the oil is probably pointless since even brand new oil turns black as soon as you run the engine. Oil should be changed every 3000 miles for the absolute best care.

• Check the power steering fluid to make sure the fluid level is proper and the fluid is clean and does not smell burned. ATF is the proper fluid for this system. 

• Pull the radiator cap and look at the water. It should be either blue or green coolant in the system. Mercedes coolant is Blue and others are generally green. In addition smell the coolant to see if it has a metallic smell. If it does and the coolant is tinged brown or hazy the coolant is old. Coolant should be changed every 2-3 years. 

• Open the brake fluid reservoir and see what color the fluid is. It should be virtually clear. If it is darker it is probably old brake fluid which is hard on the braking components. Mercedes recommends break fluid to be changed every spring. 

• And finally check the transmission fluid to make sure it looks clean and pink and does not have a burned smell. Also be sure it is at the proper fluid level after the car has been driven for 15 min and the engine is fully warm. 


CHECK FOR LEAKS

FLUIDS

While many old cars leaked Mercedes made pretty drip free cars. Again don't let a mechanic tel you, "they all leak like that". The only way that is true is if they need seals and gaskets replaced. So, if you see drips everywhere know you will either have to live with the leaks or have them fixed. 

As these cars continue to age with higher milage, be sure to check for any leaks at the transmission. Once fluid begins to seep from the servo covers the transmission is more than likely in need of a rebuild or replacement. It is important to note, a rebuilt trans replacement is not that costly. There is a very reputable Mercedes transmission rebuilder who has excellent prices and a good warranty. 

INJECTORS

Injectors should be dry and return hoses should be soft. If hoses are crispy they need to be replaced immediately. If the injectors are leaking at all they will need to be rebuilt. 

WATER PUMP

There should be no indication of corrosion around hosing and pump.


CHECK UNDER HOOD COMPONENTS

W123 Mercedes diesel fuel injection system

CHECK AIR FILTER

Should be clean

CHECK BELTS

Should be tight and crack free

BATTERY TRAY

The battery trays were notorious for rusting through. 

ENGINE MOUNTS

While the diesel motors do emit plenty of vibration it should not be unpleasant. Should the vibration be excessive, it may simply be the engine mounts that are bad. Due to the considerable wear and tare these mounts are subjected to, they will need replacing more frequently than that of a gasoline engine. I would only recommend Mercedes-Benz mounts as aftermarket brands have dismal results. 


OTHER COMPONENTS

LIGHTS

While inspecting the car, check to make sure all the lights work. Turn the headlight knob to the right once for marker lights, second click to the right for head lights, and while in the headlight mode pull the knob one click to activate the fog lights. The knob can be pulled out one more time should the car be equipped with rear fog lights but W123's destined for America did not have the rear fog light wired. After completing that check, turn the switch back to off and turn the knob left one turn and check to see that one side of the car from and back parking lights are light and the second turn to the left will turn on the opposite side front and back. These are used in Europe when parked overnight on the street.

Also, check reverse lights, number plate lights (X2), and interior trunk light


MULTI FUNCTION STALK

WIPERS

Check wipers. Please do not run the wipers dry on the windshield unless the owner says it is ok. you can always pull the wiper arms off the glass to the fully open poison and operate them. Running wipers dry can instantly leaves marks in the glass. The W123's had three wiper settings: Delay, slow and high speed. 

TURN SIGNAL

Standard operation for the turn signals. They do cancel however much later than many American cars of the day. They will cancel near the very and of your turn, but if set correctly will cancel only when the wheel has returned to almost straight ahead. Two large green arrows should flash on either side of the speedometer. Should the turn signal(s) flash rapidly either a bulb is burned out or the relay has failed. The relay for the turn signals is combined in the hazard switch button.

HIGHBEAMS 

As with late model cars, pull the stalk toward you to flash lights and push forward to turn on high beams. A blue indicator light should light on the lower portion of the instrument cluster. 

CRUISE CONTROL 

The cruise control is operated by both vacuum and electric components. If the the car has vacuum leaks the cruise control will not work. Know also that there is a good possibility that the cruise control module will not be working or working properly after all these years. Rebuilt units can be obtained for about $250 and is an easy installation. Before doing that however be sure it is not the vacuum portion of the cruise control that is mounted under the hood. Those are considerably more costly. Or, you can just forget the car has cruise control and remove it from the vacuum system. 

HORN

The horn should sound from any location on the horn pad with a very light touch.

HVAC

A number of W123's were fitted with the Delco compressor that never worked properly even from day one. While you can still get rebuilt units they are all tragic units that will only deliver a short life span and plenty of leaks. There is an excellent retrofit available to do away with these problems. More on that in a future article. Since various years had different systems, do you research on which year you are looking at and what system it has to properly test it. 

GEAR CHANGE LEVER

The gate shift lever should operate very smooth and with little effort. Any play in the lever may indicate a warn or broken bushing at the transmission. 

HAZARD LIGHTS

Test hazard light switch. If hazard lights do not work or work erratically, see turn signal section above.

IDLE CONTROL KNOB

Located on the dash just under the left side of the instrument cluster, is, or should be a black plastic flat knob. This knob adjusts the idle for cold starting and can also be used to increase the idle a bit while using the A/C. This knob is manually linked by Bowden cable directly to the throttle linkage. Turning the knob to the left will increase your idle while the revers will lower it. This knob however should never be turned to the left (increasing the idle) without depressing the throttle peddle. Turning the knob with out depressing the throttle often results in breaking the knob. The idle can however be turned down with out depressing the throttle peddle.

WINDOW WINDERS OR POWER WINDOWS

Test all power windows or window winders. The windows should operate smoothly and quietly in either case. Any binding during operation could be an indication of a future failure. 

SUNROOF (If fitted)

Make sure it has been well taken care of and there is no evidence of rust or leaks.

VENTS

Check all HVAC vents that they can be opened and closed and otherwise adjusted as original.

DOOR LOCKS

There is a good chance that the vacuum system has leaks. If this is the case, the door locks ma not work along with the fuel filler door lock and trunk lock. If the system is leaking it may also make it difficult or impossible to turn the engine off with the ignition key. The central locking system however can disconnected from the main vacuum line and be plugged. The locks can then be operated manually. 

DOORS/TRUNK

Doors should shut and latch easily and open just the same. If the doors do not close and open with precision question if the car has been in an accident or restored. In addition check all gaskets for deterioration. 

HOOD

The hood should open and close with ease and the under hood insolation should be in place. If the insolation has been removed or is deteriorated, it should be replaced at once to avoid ruining the paint. 


CONCLUSION

Other accessories the car may be equipped with should be looked at carefully along with careful attention to detail. Should you find a good specimen, you will have yourself a great, if not the best car on the road today. 

Again, this is only a rough check list and not necessarily complete, so do your homework and feel free to reply with any questions. 


Monday, October 7, 2019

Mercedes Steering Coupler / Rag Joint Replacement

Excess play in the steering of your Mercedes-Benz might be an indication that the steering coupler or "rag joint" may need replacing. There are of course other factors that can cause loose or sloppy steering, but for the sake of this article we will only focus on the proper way to replace the steering coupler and do several other checks while doing the procedure.

The work in this case is being performed on a 1981 Mercedes 240D - W123 (2nd generation steering column) and is also very similar in procedure as the early R107 and W123 series as well. Differences between Early R107 and W123 vs. later models is the set up of the steering column. Other models may be similar, but I advise you refer to the shop manual for the specific model for verification.

Again, there is much misguided information online for doing this job, however this is a very straightforward process that is listed in the Mercedes worship manual and does not require removing the steering box and also allows you to go through the and clean the steering shaft, bearings, etc. 

As you will see, this does not take incredible skill or time to perform. It should take no more than 1hr. to perform this service. I always recommend taking photos as you go!

Recommend parts for the job: Mercedes-Benz steering coupler MB Part: 1234600210, two coupler bolts MB Part: 2029902101. I do not recommend reusing the original bolts. Steering column boot (at firewall) MB Part: 1234621396

Optional Parts: steering column bearing MB part: 1269810025, directly behind steering wheel. My bearing had been making noise and discovered it was full of dirt. This may be more of an issue due to the car having spent its entire existence in the desert. There is also another identical bearing at the opposite end of the steering column tube, but mind was not acting suspicious and so I just sprayed lube into the bearing area.Regardless, it may be a good time to re-lubricate it. I use Würth greases for hinges and fittings such as this along with the throttle linkage which should be lubricated yearly.

STEP 1
Disconnect Battery

STEP 2
Remove driver side under dash covering. 

STEP 3
Center wheels, this is not critical on removal but will have to be done on reassembly. Remove steering wheel emblem or horn pad, which ever is less destructive to the old materials. Always go gently and do not use a screwdriver. Only use plastic trim removal tools. 


STEP 4
Remove steering wheel hex cap screw or nut and remove steering wheel. The hex bit socket should be 10mm. Always make sure the socket for either the nut or the screw the perfect fit and is fully stetted. IMPORTANT: Do Not use the steering wheel lock for the resistance needed to remove the steering wheel hex socket screw, or nut. Unlock the steering column by means of your key and be sure it is fully unlocked before proceeding. 


Shown on W123 late model


STEP 5
Remove rubber multi-stalk control boot at column. Gently pry off with plastic trim removal tool.


STEP 6
Unscrew multi-stalk controls from column in addition to the horn contacts (1 brown, 1 black wire)


STEP 7
Unplug turn signal stalk and cruise control (if equipped) from underside of dash to left of steering column.


STEP 8
Gently work wires and plugs through steering column. While it all looks like too much to come through, it will, but it's a snug fit. Don't yank as you can break solder connections in plug. Once the unit has been removed from the steering column notice the exact position of the steering shaft. The steering shaft is in the correct position when the shaft locks into position with the key out of the ignition. THIS STEP IS IMPORTANT for reassembly to ensure the steering wheel locks when car is parked and to ensure turn signal will cancel and remain on at the proper times. 


STEP 9
Remove decretive column cover. This step is not necessary, but since I was in it this far I decided to remove two screws and detach the short plastic column cover for cleaning. You will however need to remove snap ring around steering shaft. 


STEP 10
Put steering wheel back on shaft, but do not bolt on. Open the hood to access the steering coupler (rag joint).

STEP 11
The two hex cap screws are located adjacent to each other with the two screws facing opposite directions. This will require the steering wheel to be turned slightly to access both screws. Again, DO NOT strip these hex socket screws. If the car has lived in a humid/winter environment soak liberally with PB blaster or similar 3-4 hours prior to removing. It is strongly advised to use air impact tools for removal to reduce the chance of stripping the head.


STEP 12
Return to inside of car and undo hex socket screw from the second coupler under the dash. The steering wheel may need to be rotated a bit to access the screw. Once the screw is accessible, remove using a socket wrench. This one is not going to be seized unless it has gotten wet. Once removed, turn the steering wheel a few inches left and right to loosen the interior coupling. 


STEP 13
Remove steering wheel.

STEP 14
From inside of car, remove steering column boot and press toward the engine bay. More than likely this boot will be very dry rotted and will need replacing. The part is available from Mercedes-Benz. 

STEP 15
At this time you will also jack up the front of the car and place jack stands at the proper jack points. Remove driver side wheel and remove the three bolts holding the steering box to the fender. NOTE: I found this to work best with two people to make sure the steering box did not shift to suddenly. The steering box will sit in place once released. To make room to easily remove the steering coupler, simply move the steering box toward the front fo the car about 1-2 in. or 2.54 - 5.08cm. You will need someone to also help you bolt the steering box back into position once the new coupler has been installed.

STEP 16
With a suitable long handled flat end pry bar, loosen steering coupling by gently pressing toward firewall. Once the coupler is mostly released from the splined steering box shaft, you may need to return to the side of the car to gently wiggle the crush tube portion of the steering column away from the main steering shaft. I discovered a few back and forth trips, between wiggling the coupler and the crush tube loosened it up and the coupler and the crush tube easily separated. 


STEP 
At this point you are ready to install your new coupler, boot, and screws. IMPORTANT: When fitting the new coupler, it is critical that the steering shaft be properly aligned as described in STEP 8. In addition, the wheels need to be manually adjusted to straight ahead, or your steering will be off center. DO NOT, compensate adjusting your steering wheel installation for not having your wheels in the proper position. Steering coupler screws should be torqued to 25Nm. 

Don't forget to put your new boot on before you affix the coupler.

STEP 18
MAKE SURE EVERY NUT, BOLT, SCREW AND SNAP RING IS PROPERLY FITTED! Take a test drive on side streets making plenty of turns etc. before going out on the highway. Check and recheck your work. 

Optional Bearing Change

If you wish to change out the nearside steering shaft bearing it is indicated in the photo below.


Gently tap bearing out evenly all the way around. It will require separating the bearing from the housing with a fine screw driver you are willing too dull. It will take a minute or two of some determined tapping, not beating. When the bearing has been removed install new bearing with even taps around entire circumference as to not insert at any angle. 


Thursday, September 12, 2019

W123 Mercedes CV Boots and Axles

Cracked CV boots are nothing new, but replacing them can be costly, and the axles might not warrant the time or money if the milage is high enough or the boots have cracked. Reconditioning an axle in uncertain condition will likely not serve you well in the long run and could easily lead you to spend even more money having to install new axles in the end. Instead, consider replacing the axles. Wait! It's not as hard as it sounds!

Mercedes-Benz used two types of axles, homokinetic and annular. According to Mercedes, the W123 could have either axle depending on the year it was built so make sure you check your vin and the axle itself before you make a purchase. Regardless, if you are in need of new CV boots with original high milage axles, this would be the time to move ahead with replacing the entire unit.  If your chassis is already fitted with annular, the job will be that much simpler. 

So what's the difference? What's better? Why convert? Who cares?

The difference between homokinetic and annular is how it functions, and that is a subject we will not cover here, but we will cover how they differ with regard to installation.

The following image shows the Mercedes-Benz OE annular axle along side the aftermarket axle that is a cross between an annular and a homokinetic based on the one piece design. The Mercedes axle as you can see requires a "flange" sitting separate from the axle which will be permanently installed in the differential making for a much simpler repair or replacement in the future.


At this point you have several options for this job. First, you can purchase a rear axle flange (needed for conversion from homokinetic to annular) and annular axle from Mercedes. Second option, purchase an aftermarket or refurbished homokinetic unit. Third option, install an aftermarket unit.

Is one better than another? If you are purchasing MB annular axles (homokinetic is no longer made by Mercedes), you are getting an excellent product, the same quality that has probably lasted 40 plus years. Should you go the direction of aftermarket or rebuilt, you run a good risk of noise, vibration and a much shorter life span.

After much research, I purchased what I believed to be the best aftermarket axle on the market, and unfortunately had my slight bubble of hope burst by what I saw, felt and heard. In fairness, it didn't appear all bad, but nothing I would want on my car. Ultimately I wanted to see if a $160 aftermarket axle could by chance prove good enough, and sadly it did not. Most often the old adage holds true, "you get what you pay for".

In brief, the new aftermarket axle right out of the box had a tremendous amount of play in each joint, along with internal components that already clicked and clacked against each other while being pivoted by hand. The original Mercedes axle however, was nearly impossible to move by hand, and no internals could be heard contacting each other what so ever. Several other observations with the aftermarket: the boots were manufactured of substantially thinner rubber, and one of the boots was not installed neatly. In addition the shaft was substantially thicker than the MB unit leading me to believe they have used an inferior steel and need the extra diameter for structural integrity. There were also numerous other areas that lacked the detailing where seals were to seat etc. 

These multiple deficiencies did not build my confidence in the product as a whole and further more I did not want to risk introducing a potentially inferior component into a differential that I know is in immaculate condition. 

On the flip side, no matter which direction you decide to go, installing either axle style is not difficult, but requires more work to change out the homokinetic / aftermarket style should the time come again. As stated previously, the annular is very straight forward after the MB flange is fitted.

Coming Up:  Step-by-Step removal and installation of the rear axles.

Sunday, September 8, 2019

Retro W123 Mercedes Factory Window Sticker, Booklets


It's not often that one gets to purchase a car with most all of the original paper work, manuals, etc. I was grateful to have had the opportunity to acquire my 1981 Mercedes 240D from the original owners of 34 years who not only kept the car in near perfect condition, but included most all the original near perfect documentation from the factory.

Liking automotive history and the stories that go along with cars got me thinking that as younger generations begin to collect cars, many might not have access to some of the original factory pieces. In as much, many old enough to have known these cars from the beginning may have all but forgotten just how it was.

The following I compiled as both a historical perspective, and for some a journey down memory lane. You will see the original books (and page examples in the books) manuals,  inserts and factory invoice (window sticker), and the touch-up paint that came with my 1981 240D. From what I have been told, the only piece that is missing is the service log booklet.


Manufacturer invoice "window sticker"


This would also have been on the window adjacent to the above window sticker


Original envelope mailed June 16, 1981 to owners after purchase from Mercedes-Benz U.S.A. in New Jersey. The following 8 documents were in this envelope.  


Document 1 from envelope

Document 1 example of inside pages

Document 2 from envelope


Document 2 example of inside pages


Document 3 from envelope


Document 4 from envelope


Backside of document 4 above

Document 5 from envelope

Document 5 example of inside pages


Document 6 from envelope

Document 7 from envelope
Document 8 from envelope
Owner's Manual and other glovebox documents that came with car at time of purchase
1981 240D, 300D, 300CD Mercedes-Benz owner's manual

1981 240D, 300D, 300CD Mercedes-Benz owner's manual inside pages
1981 Mercedes U.S.A. diesel fuel guide dealer location booklet
1981 Mercedes U.S.A. diesel fuel guide booklet inside pages

1981 Mercedes North America FM Stereo Radio usage booklet
1981 Mercedes North America FM Stereo Radio usage booklet inside pages
This 1981 Mercedes Consumer Information booklet is applicable to the 240D as well and was required by U.S.A. Federal law on stopping abilities etc. It appears Mercedes was able to use this with all W123 models as the information was applicable throughout the model range
This 1981 Mercedes Consumer Information booklet inside pages
Hang tag on cruise control stalk still complete with original string


Tire information card. This was found under the original spare tire from 1981


This sticker is located on the inside of trunk lid


Touch-up paint


This is a photo of the Norman Scott, Inc. Houston, TX dealership where my W123 was purchased. Image appears to be from the 70's. From this photo the dealer did not sell Mercedes-Benz at the time, and evidently did not sell Mercedes for very long. Research shows that Norman Scott, Inc. primarily sold Porsche and Audi for most of its existence along with several other dealerships that sold other marques.